Home Assistant
A few years ago, when I got a more powerful server, my Raspberry Pi 4 ended up at the bottom of a cabinet, waiting for a new purpose.
I've been interested for some time in home IoT devices and home automation in general. Not so much smart lights, but other sensors.
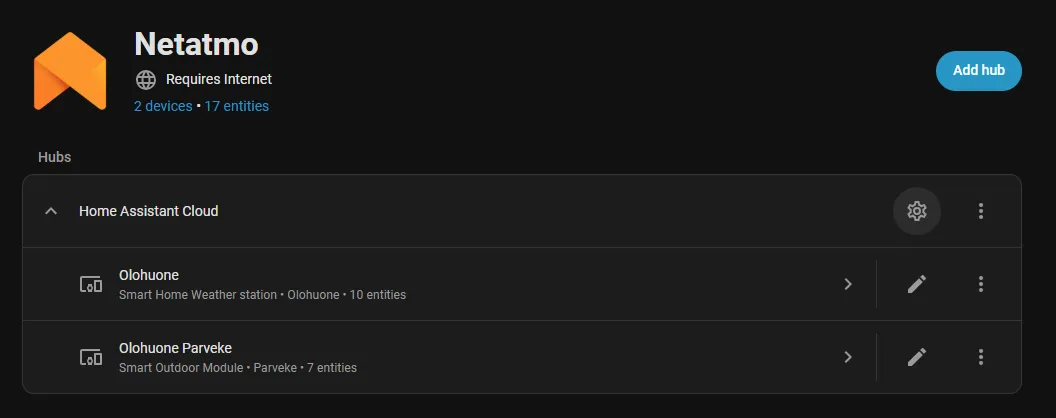
I've been using a reliable Netatmo weather station with both indoor and outdoor units for several years now. In addition, you could certainly call our family's hardworking robot vacuum an IoT device as well. Although these devices work well, a clear drawback has been that they are primarily controlled through their own mobile apps by default.
I've been aware of the open-source Home Assistant https://www.home-assistant.io/ home automation system for some time, and now I thought I'd try to see if it could replace these separate mobile apps and bring all the data from my IoT devices together in one place.
Installing Home Assistant went smoothly by following the official instructions (The hardest part was finding a memory card that could be formatted completely empty). There are numerous installation options for Home Assistant. You can install it as an operating system (Linux), which is also the recommended method for most devices. Alternatively, Home Assistant can be installed in a container. It is also possible to purchase Home Assistant pre-installed on dedicated hardware: the Home Assistant Green and Yellow devices.
After the installation, I started the configuration. There was a ready-made integration for Netatmo, which was very easy to set up without any issues.
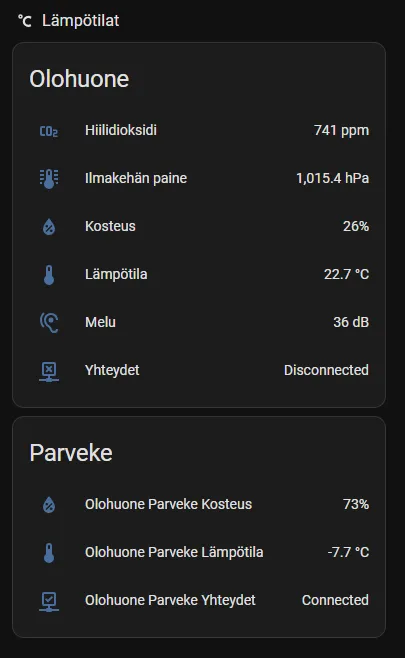
 Home Assistant uses the term 'entity' for individual pieces of sensor data. Entities can be displayed on the Home Assistant dashboard, or the device data can be presented using widgets.
Here are the Netatmo weather station data displayed on the front page using a widget:
The next step was a bit more challenging: connecting the robot vacuum to Home Assistant. Fortunately, there is an unofficial integration created by the open-source community: Dreame Vacuum https://github.com/Tasshack/dreame-vacuum. Home Assistant also has an add-on called HACS (Home Assistant Community Store), where the community can publish unofficial Home Assistant integrations and extensions. Installing HACS went smoothly by following the official instructions: https://hacs.xyz/docs/use/
After installing HACS, I still needed to install the actual Dreame Vacuum integration. This is where I made a mistake. I installed the stable release, even though I should have installed the beta release. The stable release didn’t include support for my robot vacuum; support is only available in the beta release. Of course, this would have been obvious if I had just taken the time to read the documentation on the GitHub page.
I had already given up once, until last night after the kids went to bed, when I ended up reading the Home Assistant discussion forum and came across a post about a similar issue with a non-working integration. You really should always read the instructions all the way through before starting… The fix was simple: uninstall the stable version and install the beta version instead. After that, Home Assistant connected effortlessly to the robot vacuum.
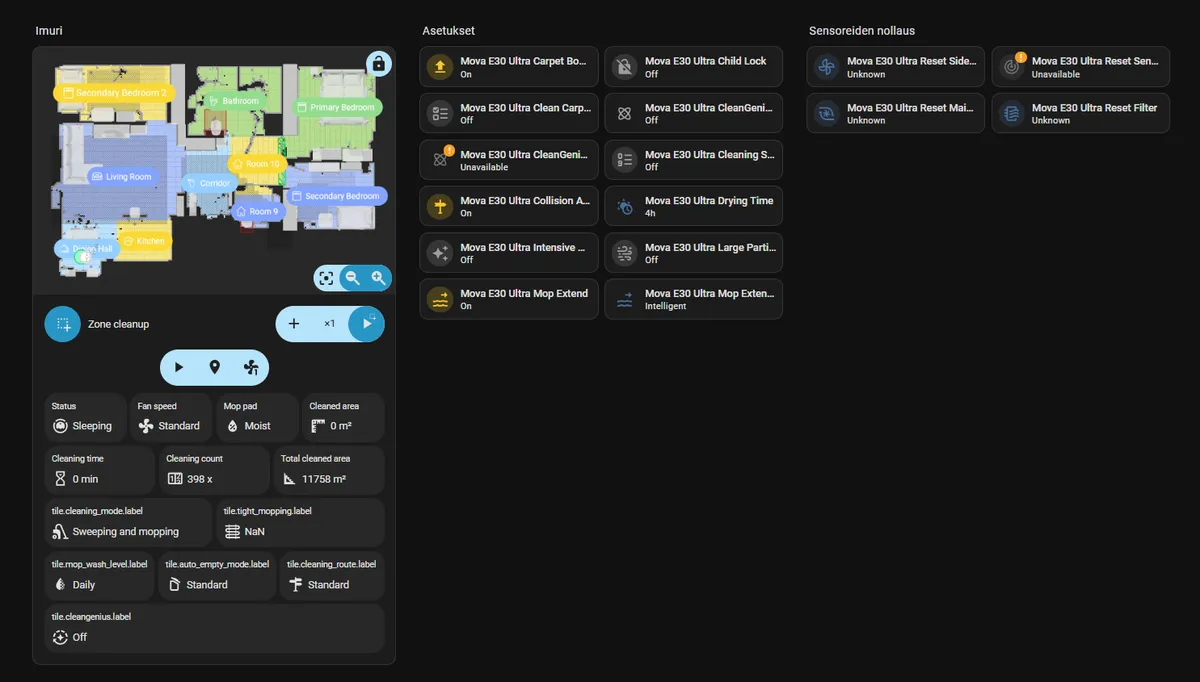
The integration provides a huge amount of sensor data from the robot vacuum—more than I wanted for building the view I wanted on the front page.

The community-developed Dreame Vacuum integration doesn’t include any ready-made widgets by itself; these need to be installed separately. For my robot vacuum, two ready-made widgets were available through HACS.
After installing the widget, my Home Assistant front page now proudly displays a floor plan of my apartment along with all the necessary information and buttons to control the vacuum.
Now I had achieved my original goals: having both the Netatmo and robot vacuum data available in one place. But, as always, appetite grows as you eat. Next, I’m starting to create real automations. For this, my child and I went to our local IKEA to buy new sensors that support the Matter over Thread standard.
We purchased a water leak sensor klippbok-water-leakage-sensor and a door/window sensor myggbett-door-window-sensor-smart. The water leak sensor will be used to monitor the dishwasher, and the door sensor will be installed on the front door.
To get started with these, a Thread network needs to be established at home. I didn’t want to buy IKEA’s ready-made hub, so I decided to get a separate Connect ZBT-2 radio https://www.home-assistant.io/connect/zbt-2, which supports both ZigBee and the Thread standard. More on this later.
To be continue...